 Save
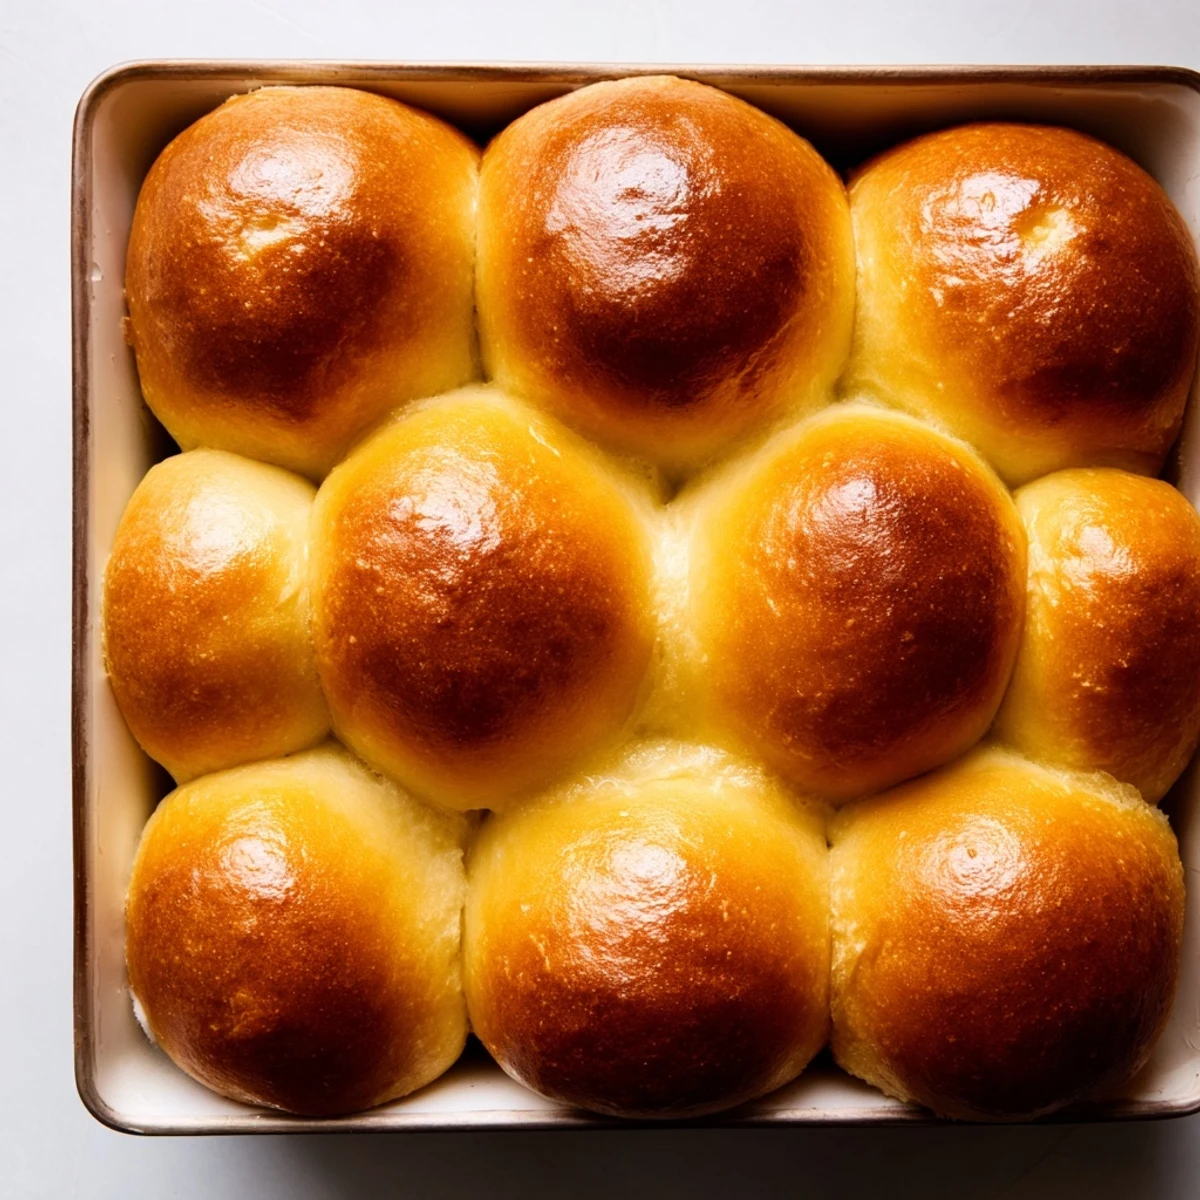
Save These buttery brioche rolls deliver the perfect balance of rich flavor and pillowy softness. Made with generous amounts of butter and eggs, the dough develops into golden, cloud-like rolls that transform any meal into something special.
The process involves a straightforward two-rise method, yielding twelve beautiful rolls with an irresistibly tender crumb and golden crust. While they require patience during rising, the reward is bakery-quality brioche that rivals any French patisserie.
Serve these warm with jam and honey for breakfast, or alongside savory dishes for dinner. They freeze beautifully, so you can always have fresh-tasting rolls on hand for unexpected guests or everyday indulgence.
The smell of butter melting into warm dough still pulls me back to my tiny apartment kitchen, where I first attempted brioche on a gray Sunday morning. I'd been intimidated by French breads for years, convinced they required some magical touch I didn't possess. That first batch came out slightly uneven, but tearing into a still-warm roll changed everything. Now I can't imagine a holiday table without them.
My sister visited last winter during that stretch where the sun barely seems to rise, and I woke early to make these. She stumbled into the kitchen half-asleep, following the buttery scent, and we ate three rolls standing at the counter while the snow fell outside. She still texts me every time she attempts bread, asking if my dough looked as hopeless as hers does before rising.
Ingredients
- All-purpose flour: Bread flour would make these chewier, but all-purpose gives you that tender crumb that practically dissolves on your tongue
- Granulated sugar: Just enough to feed the yeast and give the barest hint of sweetness without making these dessert
- Instant dry yeast: I've kept active dry in my pantry for years, but instant cuts out a whole step and never fails me
- Fine sea salt: Coarse salt won't distribute properly, and those salty pockets are nobody's friend in a sweet dough
- Room temperature eggs: Cold eggs shock the butter and ruin your emulsion, so set them out an hour before you start
- Lukewarm milk: Too hot kills your yeast, too cold makes it sluggish, wrist temperature is your target
- Unsalted butter softened and cubed: Cutting it into cubes first prevents that dreaded moment where your dough spins around the butter chunk for eternity
- Egg wash: That glossy restaurant finish comes from this simple last step, don't skip it
Instructions
- Mix the dry foundation:
- Combine your flour, sugar, yeast, and salt in the stand mixer bowl, giving it just a few pulses to distribute everything evenly before the wet ingredients join
- Bring the dough together:
- Pour in the eggs and lukewarm milk, then mix on low until you see a rough shaggy dough forming, scraping down the bowl once to incorporate any escaped flour
- Work in the butter gradually:
- With the mixer running on medium, drop in those butter cubes one at a time, watching each disappear completely before adding the next, then let the machine knead for 8 to 10 minutes until the dough transforms from sticky to smooth and pulls away from the sides
- Let it rise:
- Transfer your dough to a lightly greased bowl, cover it with a clean towel, and find the warmest corner of your kitchen for 1 to 1.5 hours until it's doubled in size
- Shape the rolls:
- Punch down that puffy dough, divide it into 12 equal pieces, and tuck the edges under each piece to form smooth balls, cupping them in your palm against the counter
- Second rise:
- Arrange your dough balls in a greased 9 by 13 inch pan, letting them touch slightly for that pull-apart effect, cover them again, and wait another 45 to 60 minutes until they're puffy and pressed against each other
- Preheat your oven:
- Get your oven to 350°F while you whisk the egg and milk for your wash, making sure to brush the tops gently so you don't deflate all that hard work
- Bake to golden perfection:
- Slide the pan in for 18 to 22 minutes, watching for that deep golden color that tells you the outside is set while the inside stays tender
- Warm serving moment:
- Let them cool just long enough to handle, maybe 10 minutes, then serve them while they're still warm enough to melt whatever butter or jam you're spreading on top
 Save
Save These rolls have become my go-to contribution for family gatherings, arriving in a basket that somehow empties before anyone even sits down at the table. My nephew started calling them the butter ones when he was five, and the nickname stuck in our house. There's something deeply satisfying about watching someone bite into one and immediately reach for a second.
Timing Your Rise
I've learned that brioche dough has its own schedule, and fighting it only leads to dense bread. In winter, I preheat my oven for exactly one minute, turn it off, and let the dough rise in that gentle warmth. Summer days might mean finding the coolest corner instead. The dough will tell you when it's ready if you pay attention.
Shaping Without Stress
Those first few attempts gave me lumpy, uneven rolls until someone showed me the cupping technique. Using the curve of your palm to smooth the dough against the counter creates surface tension that helps each roll rise beautifully. Don't aim for perfection, aim for smooth bottoms and tucked edges.
Make Ahead Wisdom
Some of my best batches happened when I made the dough the night before and let it do its slow rise in the refrigerator. The cold fermentation develops deeper flavor, and morning baking means fresh rolls with coffee. You can also freeze the shaped, unrisen rolls and let them thaw and rise on a baking sheet while your oven preheats.
- Wrap cooled rolls tightly and freeze for up to a month, reheating at 300°F for 10 minutes
- The dough scraps from shaping can be baked alongside the rolls, perfect for the baker's snacks
- Room temperature ingredients really do make the difference between struggle and success
 Save
Save There's quiet joy in working with your hands, in watching dough rise, in feeding people something made from scratch. These rolls might take time, but that first warm bite makes every minute worthwhile.
Common Questions
- → What makes brioche different from regular bread?
-
Brioche contains significantly more butter and eggs than standard bread, creating a tender, rich crumb with a golden crust. The high fat content yields a soft texture that practically melts in your mouth, unlike the chewier structure of traditional breads.
- → Why does the dough need two rising periods?
-
The first rise allows yeast to develop flavor and double the dough volume. Punching down redistributes yeast for even texture. The second rise after shaping creates the light, airy interior structure that makes these rolls so wonderfully fluffy.
- → Can I make these without a stand mixer?
-
While a stand mixer makes kneading easier, you can mix by hand. Combine ingredients in a large bowl, then turn onto a floured surface. Knead by hand for 12-15 minutes, adding butter gradually and working until smooth and elastic.
- → How do I know when the rolls are fully baked?
-
Look for deep golden-brown tops and listen for a hollow sound when you tap the tops gently. An instant thermometer inserted into the center should read 190-200°F. The rolls should feel firm but spring back slightly when touched.
- → What's the best way to store and reheat these rolls?
-
Store in an airtight container at room temperature for 2-3 days, or freeze tightly wrapped for up to 3 months. Reheat frozen rolls at 350°F for 5-7 minutes, or wrap room-temperature rolls in foil and warm at 300°F for 10 minutes.
- → Can I add mix-ins like herbs or cheese?
-
Absolutely. After the first rise, gently fold in shredded gruyère, fresh herbs, or even dried fruit before shaping. For savory variations, reduce sugar slightly. Sweet additions like orange zest complement the buttery base beautifully.