 Save
Save Prepare a delightful confection by lining a baking tray with parchment paper. Optionally, insert a stick into each marshmallow for easier handling. Melt semi-sweet or dark chocolate, along with a touch of coconut oil if desired, until perfectly smooth. Dip each marshmallow into the rich, molten chocolate, ensuring an even coating. Before the chocolate sets, adorn them with your preferred toppings like sprinkles, nuts, or crushed cookies. Place the finished treats on the prepared tray and allow them to set at room temperature or in the refrigerator until firm. These customizable, easy-to-make sweets are perfect for sharing or enjoying yourself.
There's something uniquely comforting about a simple treat that brings a smile to everyone's face, isn't there? I remember one chilly autumn afternoon, the kids were restless, and I just needed a quick, sweet distraction. Rummaging through the pantry, I spotted a bag of marshmallows and some leftover chocolate from holiday baking, and a lightbulb went off.
Later that day, when my neighbor popped over for coffee, she was absolutely delighted to find these on the counter, still a little cool from setting. We sat there, each enjoying a marshmallow, chatting about nothing in particular, and it struck me how sometimes the simplest things create the warmest memories. The kitchen smelled faintly of cocoa and vanilla, a truly lovely aroma.
Ingredients
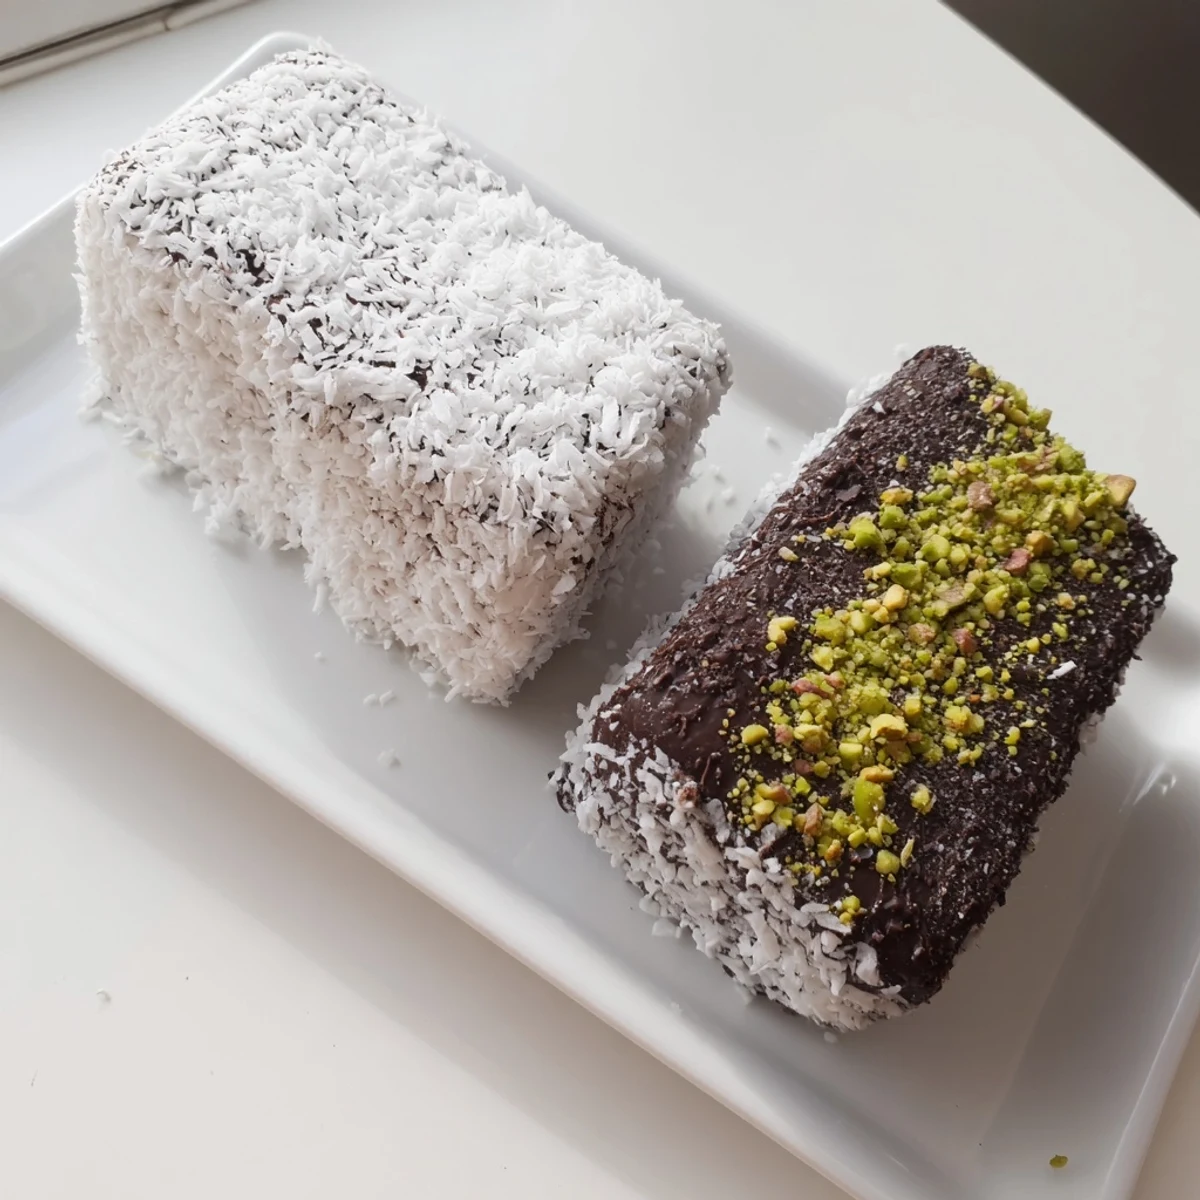
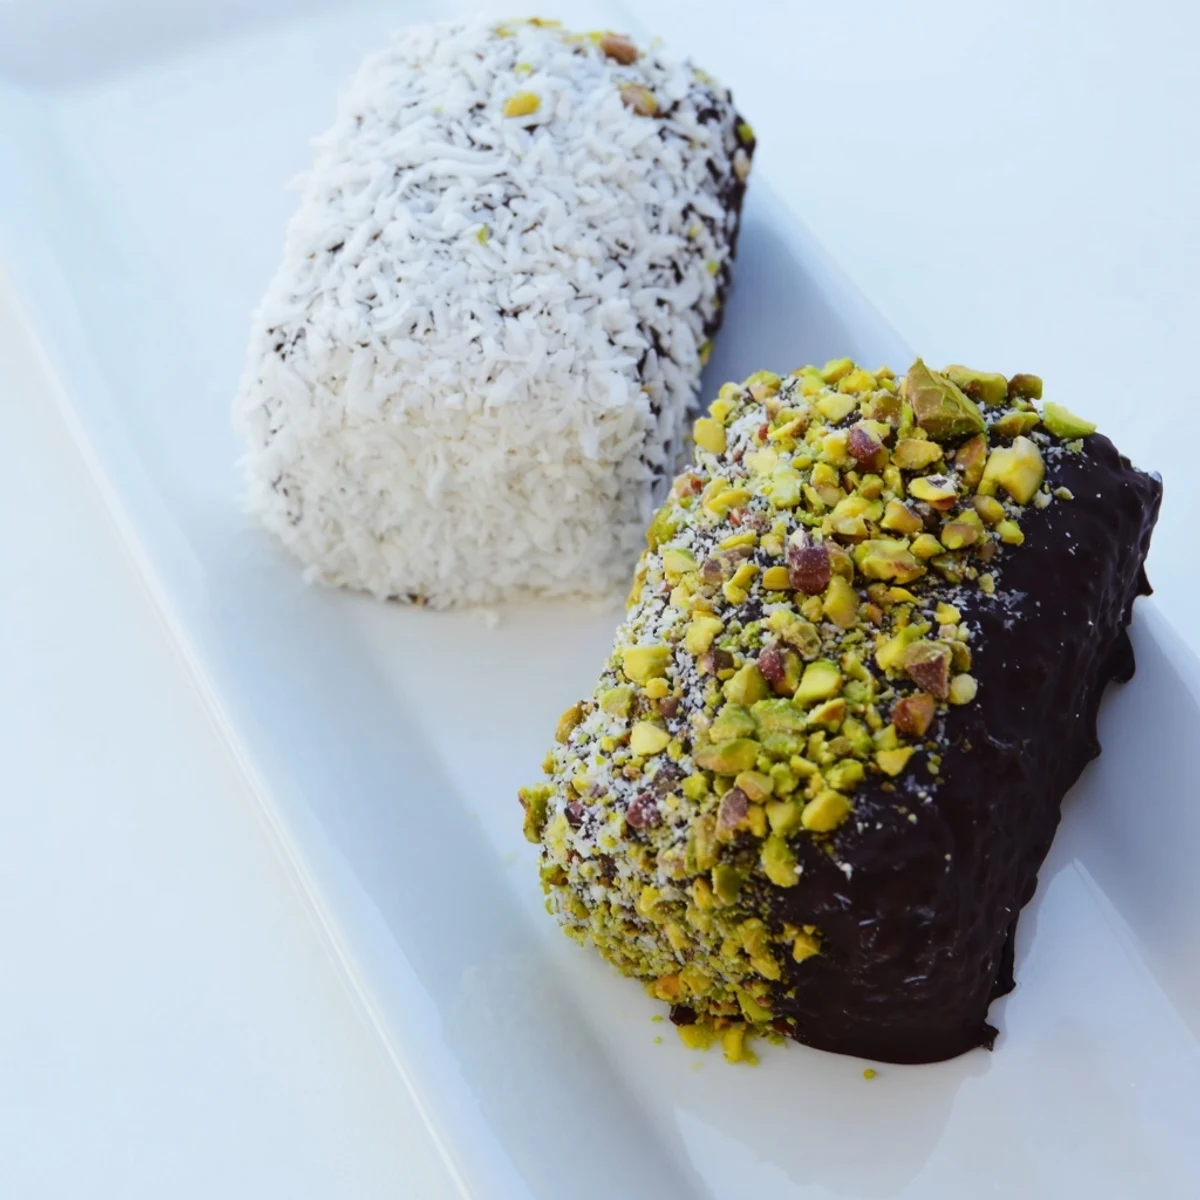
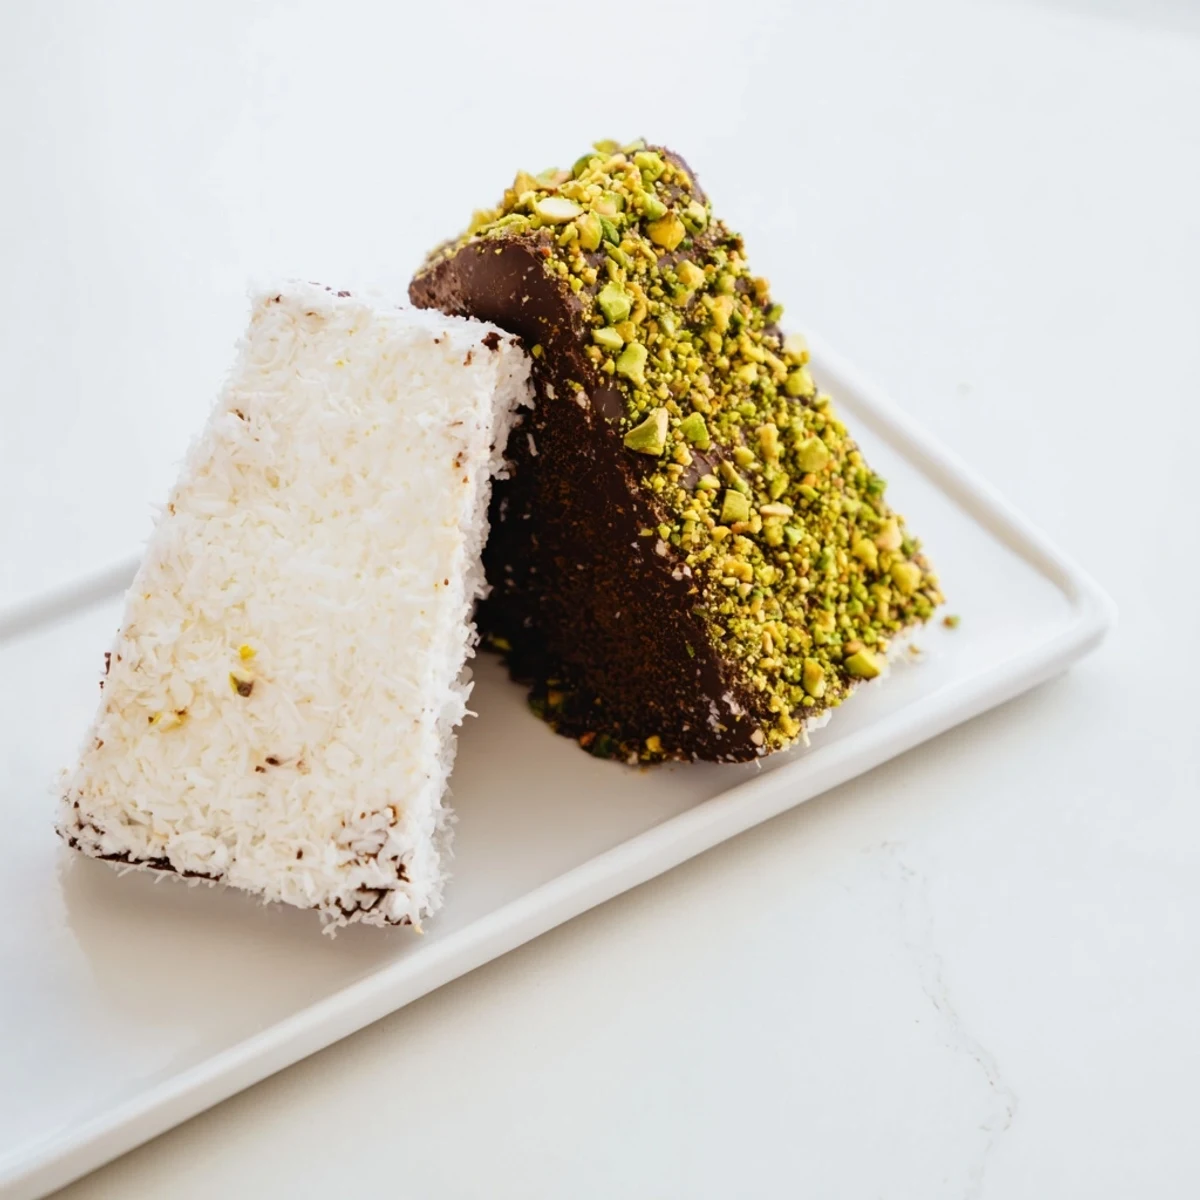
- Marshmallows: Big and fluffy are best for dipping, providing that lovely soft contrast to the crisp chocolate.
- Semi-sweet or dark chocolate: The better quality the chocolate, the better the final taste; it's worth investing in a good bar.
- Coconut oil or unsalted butter: Just a touch makes the chocolate wonderfully smooth and easy to work with, preventing it from seizing.
- Rainbow sprinkles: These add a pop of color and a fun, playful texture that kids especially adore.
- Chopped nuts: Pistachios or almonds offer a sophisticated crunch and a rich, nutty flavor that pairs beautifully with chocolate.
- Shredded coconut: Toasted or untoasted, it brings an exotic sweetness and a chewy, tropical twist.
- Crushed cookies or graham crackers: For a satisfying textural contrast, think s'mores without the campfire smoke.
Instructions
- Prepare Your Canvas:
- Line a baking tray with parchment paper, ensuring your delicious creations have a non-stick landing spot. If you're feeling fancy, insert a lollipop stick or skewer into each marshmallow now for easy handling.
- Melt the Magic:
- Gently melt your chopped chocolate and coconut oil in a microwave-safe bowl, stirring every 20 seconds until it's gloriously smooth and fluid. Alternatively, a double boiler method over simmering water works just as beautifully, ensuring a silky finish.
- The Big Dip:
- Hold each marshmallow by its stick (or pinch gently) and dip it halfway into the luscious melted chocolate, letting any excess drip back into the bowl. Don't rush this part; a graceful dip makes all the difference.
- Sprinkle with Joy:
- Immediately after dipping, roll or sprinkle your chosen toppings onto the chocolate while it's still warm and sticky. Be generous here; this is where the fun really begins!
- Set the Scene:
- Carefully place your decorated marshmallows onto the prepared tray, giving them a little space to avoid sticking.
- The Waiting Game:
- Let them set at room temperature for about 30 minutes, or pop them in the fridge for a quick 10-15 minute chill until the chocolate is firm and snappy.
 Save
Save These marshmallows became a staple for our holiday cookie platters, always disappearing first. My niece, who normally turns her nose up at anything 'homemade,' once told me these were better than store-bought, which felt like the highest compliment. It's funny how a simple confection can become such a symbol of shared joy and connection.
Mastering Your Melt
Getting the chocolate just right is the trickiest part, but it's not hard once you know what to watch for. Using a microwave is fast, but short bursts and constant stirring prevent scorching and ensure a glossy, smooth finish. If you're going the double boiler route, make sure the bowl doesn't touch the water, and absolutely no steam or water gets into your chocolate, or it will seize instantly.
Topping Transformations
The beauty of this recipe lies in its adaptability, especially when it comes to toppings. Don't feel limited to the classics; I've had success with crushed candy canes around Christmas, edible glitter for a fancy touch, or even a drizzle of contrasting white chocolate over the dark. Think about themes for parties–blue and white sprinkles for a winter wonderland, or bright colors for a birthday.
Storing Your Sweet Treasures
Proper storage keeps these delightful bites fresh and looking their best for days. An airtight container is your best friend here, keeping moisture out and the chocolate from blooming. Avoid placing them near anything warm, as melting can ruin their texture and appearance.
- Humidity is the enemy; it can make the marshmallows sticky and the chocolate dull.
- They're best enjoyed within a few days for peak freshness and marshmallow fluffiness.
- If stacking, place a piece of parchment paper between layers to prevent sticking.
 Save
Save So go ahead, gather your ingredients and whip up a batch of these charming treats. They're sure to bring a little extra sweetness and a lot of smiles to your day.
Common Questions
- → What are some creative topping ideas for these marshmallow treats?
-
Beyond traditional sprinkles and nuts, consider crushed pretzels for a sweet and salty contrast, mini chocolate chips, cocoa powder, or even a drizzle of white chocolate. Get creative with themed options for holidays!
- → How should I store the finished chocolate-coated marshmallows?
-
Store your chocolate-coated marshmallows in an airtight container at room temperature. They will stay fresh for up to 3 days. Avoid humid environments, as this can make the marshmallows sticky and affect the chocolate's texture.
- → What's the best way to melt chocolate for dipping?
-
For best results, melt chocolate gently. Use a microwave in 20-second bursts, stirring well between each, or a double boiler setup over simmering water. Adding a small amount of coconut oil or unsalted butter can make the chocolate smoother and easier to work with.
- → Can I use white or milk chocolate instead of dark?
-
Absolutely! White chocolate, milk chocolate, or even flavored candy melts can be used as alternatives to semi-sweet or dark chocolate. Adjust melting times as needed, as different chocolates can vary in consistency when melted.
- → How can I ensure the chocolate sets properly on the marshmallows?
-
Allowing the chocolate to set completely is key. You can let them sit at room temperature for about 30 minutes, or if you're in a hurry, refrigerate them for 10-15 minutes. Ensure they are on parchment paper to prevent sticking.
- → Are these marshmallow confections suitable for a vegetarian diet?
-
The core ingredients can be vegetarian, but it's important to check your marshmallow brand. Some marshmallows contain gelatin, which is an animal product. Look for brands specifically labeled as vegetarian or vegan, which typically use plant-based gelling agents.