 Save
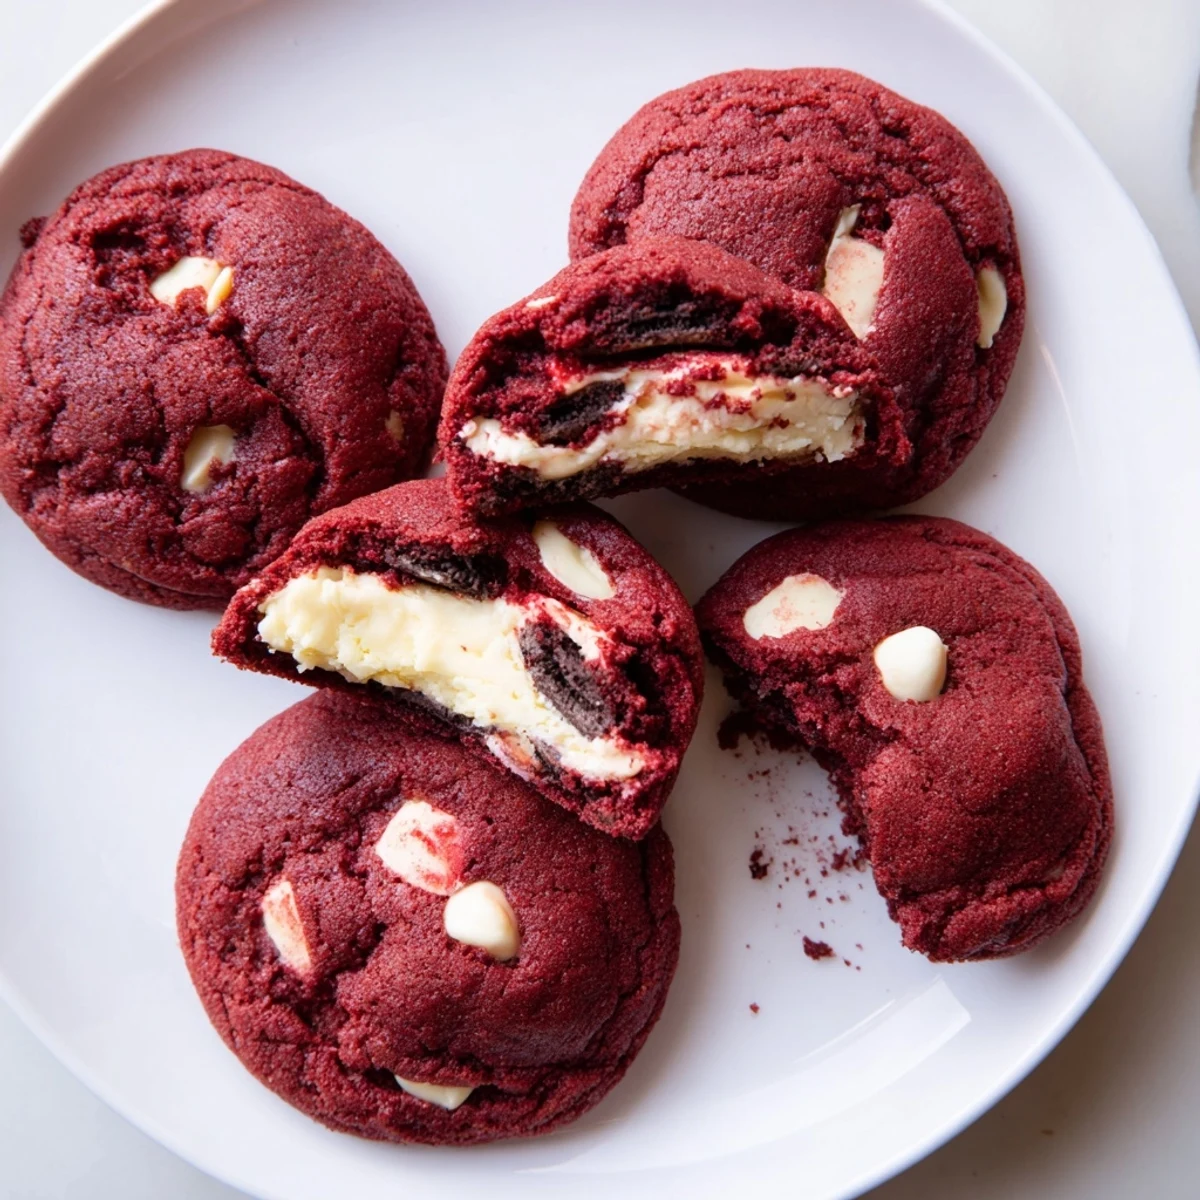
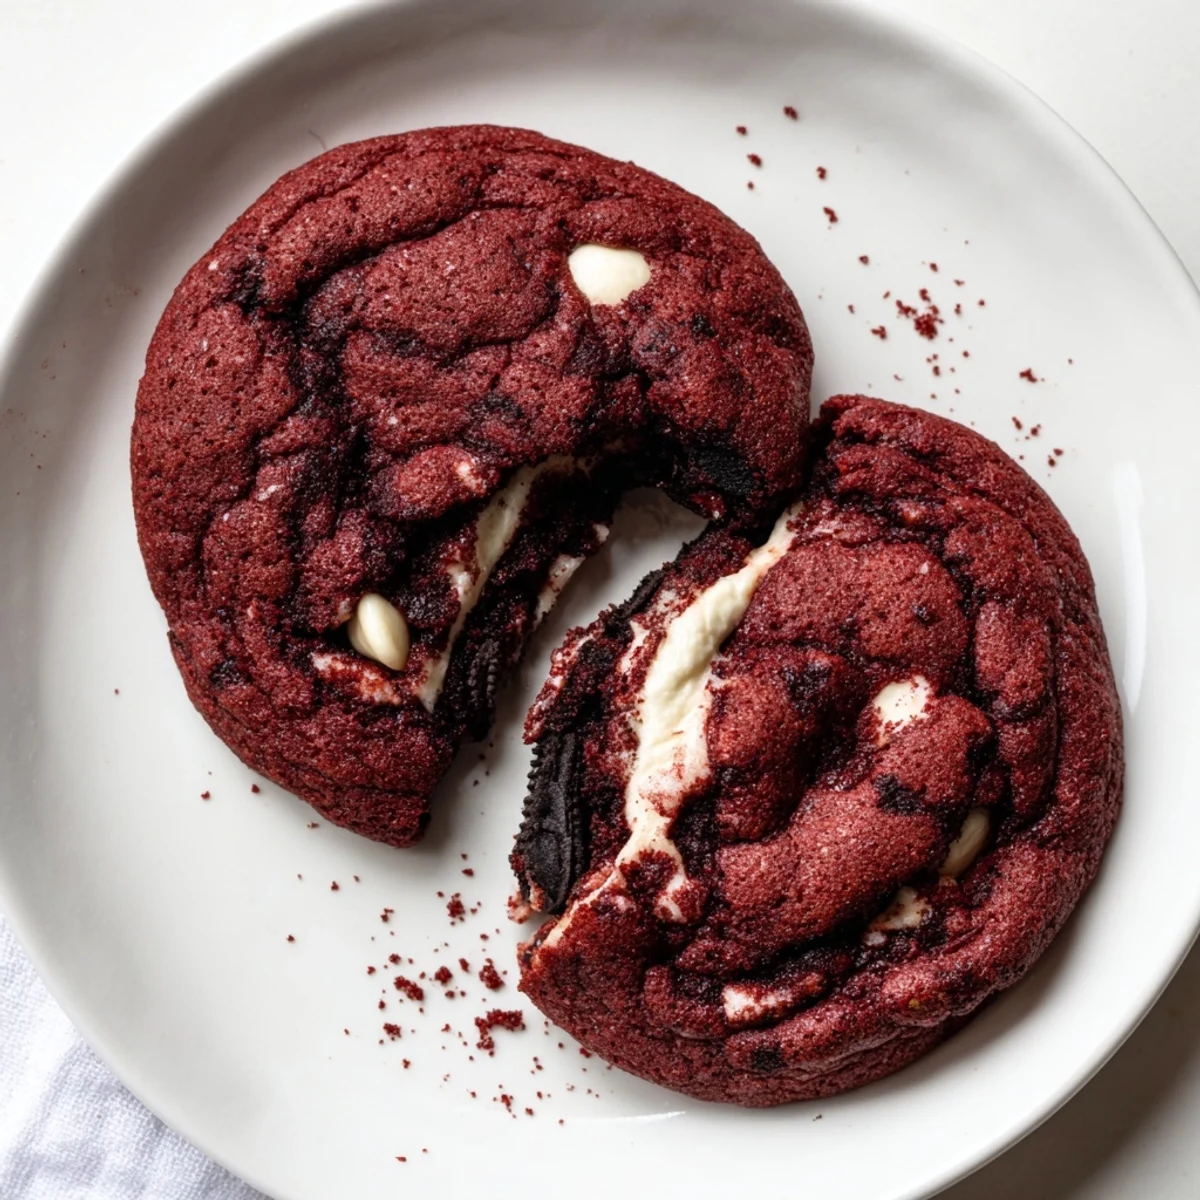
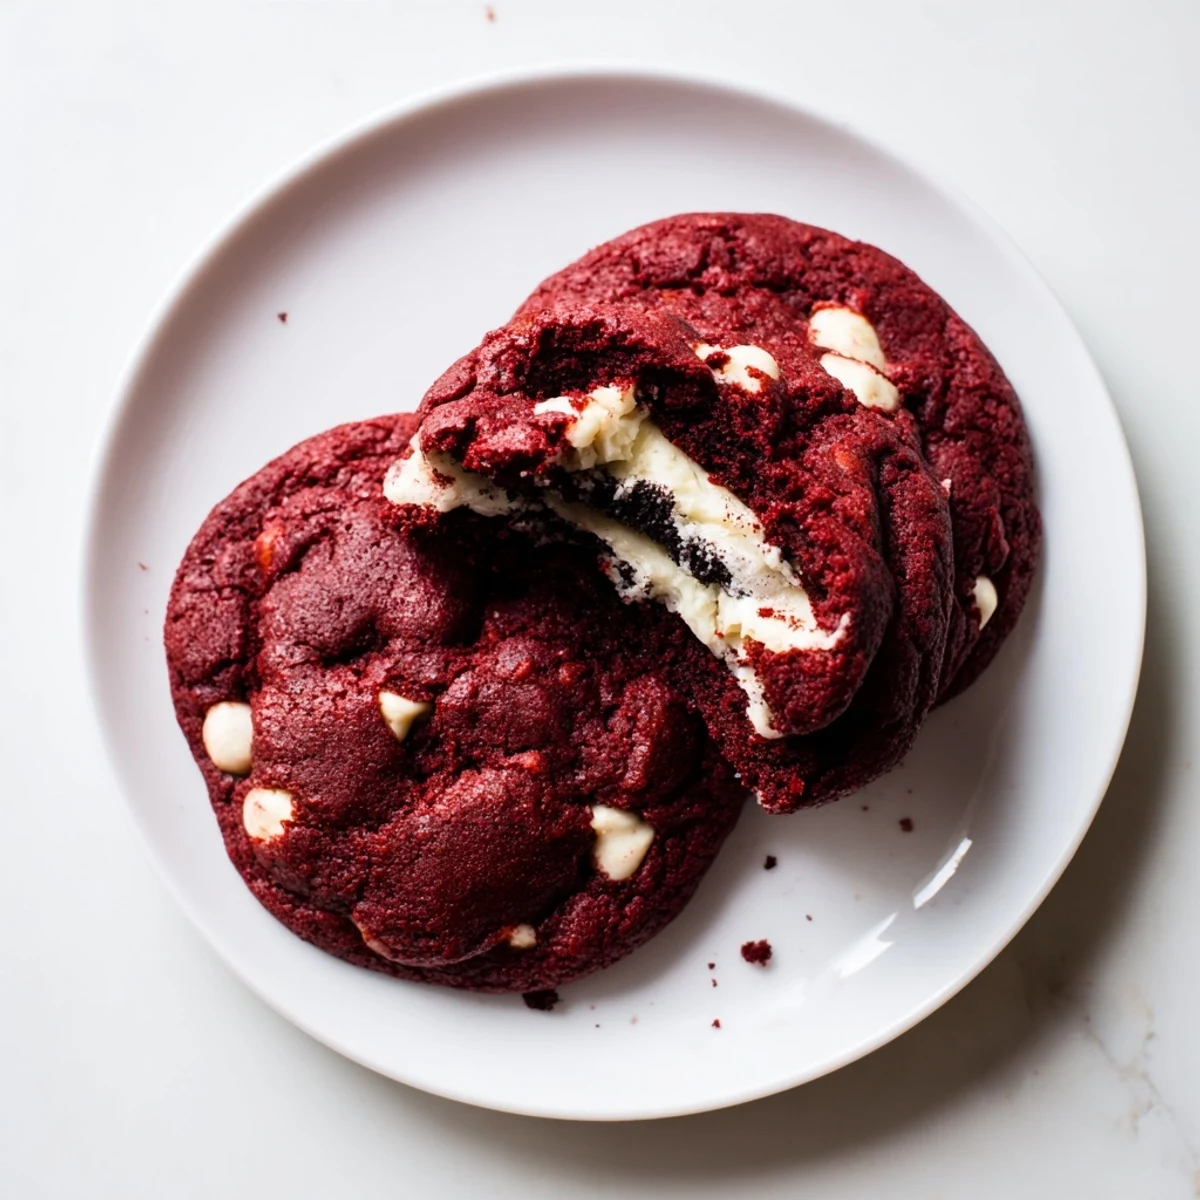
Save These stuffed cookies feature a vibrant red velvet dough enriched with cocoa powder and studded with white chocolate chips. Each cookie wraps around a creamy filling made from cream cheese, butter, powdered sugar, and crushed Oreos. The preparation involves mixing the dough until just combined, chilling the Oreo filling for easier handling, then carefully encasing the creamy center before baking.
Bake at 350°F for 11-12 minutes until edges are set but centers remain slightly soft. The result combines the classic tangy sweetness of red velvet with the familiar crunch and creaminess of Oreos. Store in an airtight container for up to three days to maintain freshness and texture.
My kitchen counter looked like a crime scene of red food coloring and cocoa powder, but I could not stop grinning. I had decided to surprise my sister for her birthday with something completely over the top, and red velvet stuffed cookies felt like the perfect chaotic energy she deserved. Three failed attempts later, I finally cracked the code on keeping that Oreo filling from melting into oblivion. Now these are the cookies she requests every single year without fail.
The first time I served these at a dinner party, my friend Sarah took one bite and literally moaned out loud. I had set them on a platter and walked away, thinking they would be a nice afterthought to dessert. Ten minutes later, I walked back into the kitchen to find everyone crowded around the counter, crumbs everywhere, debating who could eat just one more. They disappeared faster than I could brew coffee.
Ingredients
- Allpurpose flour: The foundation of your cookie base, providing structure to hold all that creamy filling inside
- Unsweetened cocoa powder: This gives red velvet its signature subtle chocolate depth without overpowering the delicate flavor
- Baking soda: Essential for helping these cookies puff up perfectly while keeping the centers chewy and soft
- Salt: Just enough to balance the sweetness and make all the flavors pop
- Unsalted butter: Softened to room temperature so it creams beautifully with the sugars for tender cookies
- Granulated and brown sugar: The combination creates chewy edges and soft centers while providing the classic cookie sweetness
- Large egg: Binds everything together and adds richness to the dough
- Milk: Just a splash to help achieve that perfect red velvet dough consistency
- Vanilla extract: Use pure vanilla for the best background flavor in both cookie and filling
- Red food coloring: Gel coloring gives the most vibrant red without adding extra liquid to your dough
- White chocolate chips: These creamy little pockets contrast perfectly with the cocoa and red velvet flavors
- Cream cheese: The star of the filling, make sure it is fully softened for the smoothest texture
- Powdered sugar: Sifted to prevent lumps in your creamy Oreo filling
- Oreo cookies: Crushed into the filling and optional for rolling, adding that iconic cookie crunch
Instructions
- Preheat your oven:
- Set it to 350°F and line two baking sheets with parchment paper so nothing sticks
- Whisk the dry ingredients:
- In a medium bowl, combine flour, cocoa powder, baking soda, and salt until well blended
- Cream the butter and sugars:
- Beat them together until light and fluffy, then add the egg, milk, vanilla, and red food coloring
- Combine the mixtures:
- Gradually add the dry ingredients to the wet mixture, mixing until just combined, then fold in the white chocolate chips
- Make the Oreo filling:
- Beat cream cheese and butter until smooth, add powdered sugar and vanilla, then fold in crushed Oreos and refrigerate for 10 minutes
- Stuff the cookies:
- Scoop dough portions, flatten slightly, place filling in the center, and fold the dough around it to seal completely
- Bake to perfection:
- Place stuffed dough balls on prepared sheets 2 inches apart and bake for 11 to 12 minutes until edges are set
- Cool completely:
- Let them rest on the baking sheet for 5 minutes before moving to a wire rack to cool fully
 Save
Save Last Christmas, I made a double batch and packed them into little boxes tied with red ribbon. My neighbor opened hers on the porch and immediately came knocking on my door, asking if there was any way I could teach her how to make them. We spent the next afternoon in my kitchen, covered in flour and laughing at our messy attempts to roll the dough. Sometimes the best recipes are the ones that bring people together.
Making Them Ahead
I love that you can prepare the filling a day in advance and keep it refrigerated until you are ready to bake. The cookie dough also freezes beautifully if you want to scoop and freeze individual portions for fresh baked cookies anytime. Just let the frozen dough balls sit at room temperature for about 10 minutes before stuffing and baking.
Customization Ideas
Sometimes I swap the white chocolate chips for dark chocolate when I want something a bit more sophisticated. You could also use golden Oreos for the filling instead of regular ones for a different flavor profile. For extra crunch, try rolling the outside of the stuffed dough balls in additional crushed Oreos before they hit the oven.
Storage Secrets
These cookies actually taste better the next day when the flavors have had time to meld together. Store them in an airtight container at room temperature for up to three days, or freeze them for longer keeping.
- Place parchment paper between layers to prevent sticking
- Bring frozen cookies to room temperature before serving for the best texture
- Warm slightly in the microwave for that fresh baked taste
 Save
Save I hope these red velvet Oreo stuffed cookies bring as much joy to your kitchen as they have to mine. Happy baking.
Common Questions
- → Can I make the dough ahead of time?
-
Yes, you can refrigerate the cookie dough for up to 24 hours before baking. Let it come to room temperature for about 15 minutes before stuffing and baking, as cold dough may need an extra minute or two in the oven.
- → Why did my filling leak out during baking?
-
This usually happens if the filling isn't chilled enough or the dough isn't sealed properly around the edges. Ensure your Oreo filling refrigerates for the full 10 minutes, and pinch the dough edges tightly to completely enclose the creamy center.
- → Can I freeze these stuffed cookies?
-
You can freeze the assembled, un baked dough balls for up to 2 months. Place them on a baking sheet to freeze individually, then transfer to a freezer bag. Bake from frozen, adding 2-3 extra minutes to the baking time.
- → What's the best way to crush Oreos for the filling?
-
Pulse the Oreos in a food processor for fine, even crumbs, or place them in a sealed ziplock bag and crush with a rolling pin. Fine crumbs distribute more evenly throughout the creamy filling than larger chunks.
- → Can I use gel food coloring instead of liquid?
-
Yes, gel food coloring works beautifully and often provides a more vibrant red shade with less product. Start with a small amount and add more as needed, remembering that gel colors are more concentrated than liquid versions.
- → How do I know when the cookies are done baking?
-
The edges should look set and slightly firm, while the centers may still appear soft and under baked. This is correct—the cookies continue cooking on the hot baking sheet during the 5-minute cooling period, resulting in perfectly chewy textures.