 Save
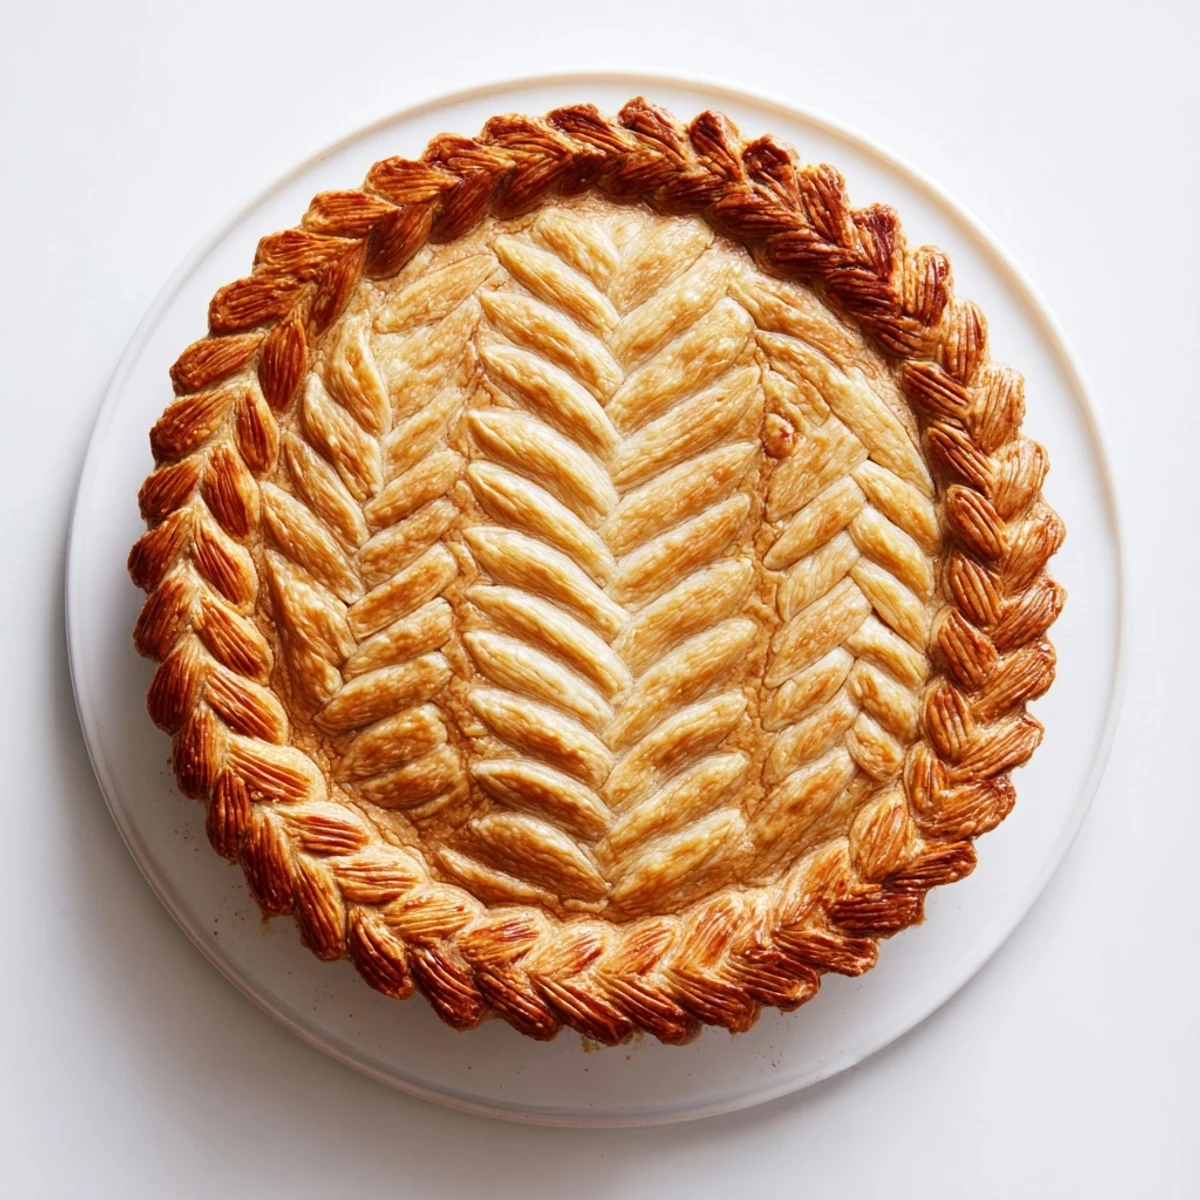
Save This fishtail braid crust technique transforms homemade pies into visually striking centerpiece desserts. The method involves creating four-strand braids from pastry strips, then arranging them along the pie edge for an intricate woven appearance. While the process requires patience and basic pastry skills, the results rival professional bakery presentations.
The dough comes together quickly using classic flour, butter, and ice water. After chilling, rolling, and cutting strips, you'll create three braided sections that get pressed onto the chilled crust rim. An egg wash ensures golden browning during the 15-minute blind bake.
This decorative edge works beautifully with fruit pies, custard fillings, or savory pot pies. The braided crust adds structural integrity while creating an impressive presentation that guests will assume took professional expertise to achieve.
The first time I attempted a decorative crust, my kitchen looked like a flour bomb had gone off. I was trying to impress my new in-laws with a homemade cherry pie, but the dough kept sticking to everything except where it was supposed to go. That mess taught me more about patience and temperature control than any cookbook ever could. Now whenever I make this fishtail braid crust, I think about how far I've come from those chaotic early days.
My sister's wedding was the real turning point for this recipe. She'd asked me to handle the dessert table for 150 guests, and I needed something that would photograph well but also taste incredible. We spent three days practicing different braiding techniques, my kitchen covered in flour-dusted parchment paper with rejected attempts. When that first successful fishtail crust came out of the oven, golden and perfect, we actually did a victory dance right there in the middle of prep work.
Ingredients
- All-purpose flour: The structure here is everything, so dont be tempted to swap in low-protein varieties that will give you sad, saggy braids
- Cold unsalted butter: Keep those cubes icy cold, working quickly so they stay distinct in the dough for that flaky magic we all want
- Salt and sugar: This little balance is what makes the crust work for both sweet and savory fillings without fighting either direction
- Ice water: Add it gradually and trust your hands, some days need more than others depending on humidity
- Egg wash: The milk addition here is my personal trick for getting that deep, professional golden color
Instructions
- Mix the dry foundation:
- Whisk your flour, salt, and sugar in a large bowl until they're completely incorporated, then get ready to get your hands messy
- Cut in the butter:
- Work those cold butter cubes into the flour with a pastry cutter or your fingertips until you see coarse crumbs with some pea-sized pieces still visible
- Bring it together with ice water:
- Drizzle in the water a tablespoon at a time, mixing gently until the dough just holds together when squeezed, then divide and wrap into discs
- Chill thoroughly:
- Pop those discs in the fridge for at least an hour, because warm dough is the enemy of any decorative crust work
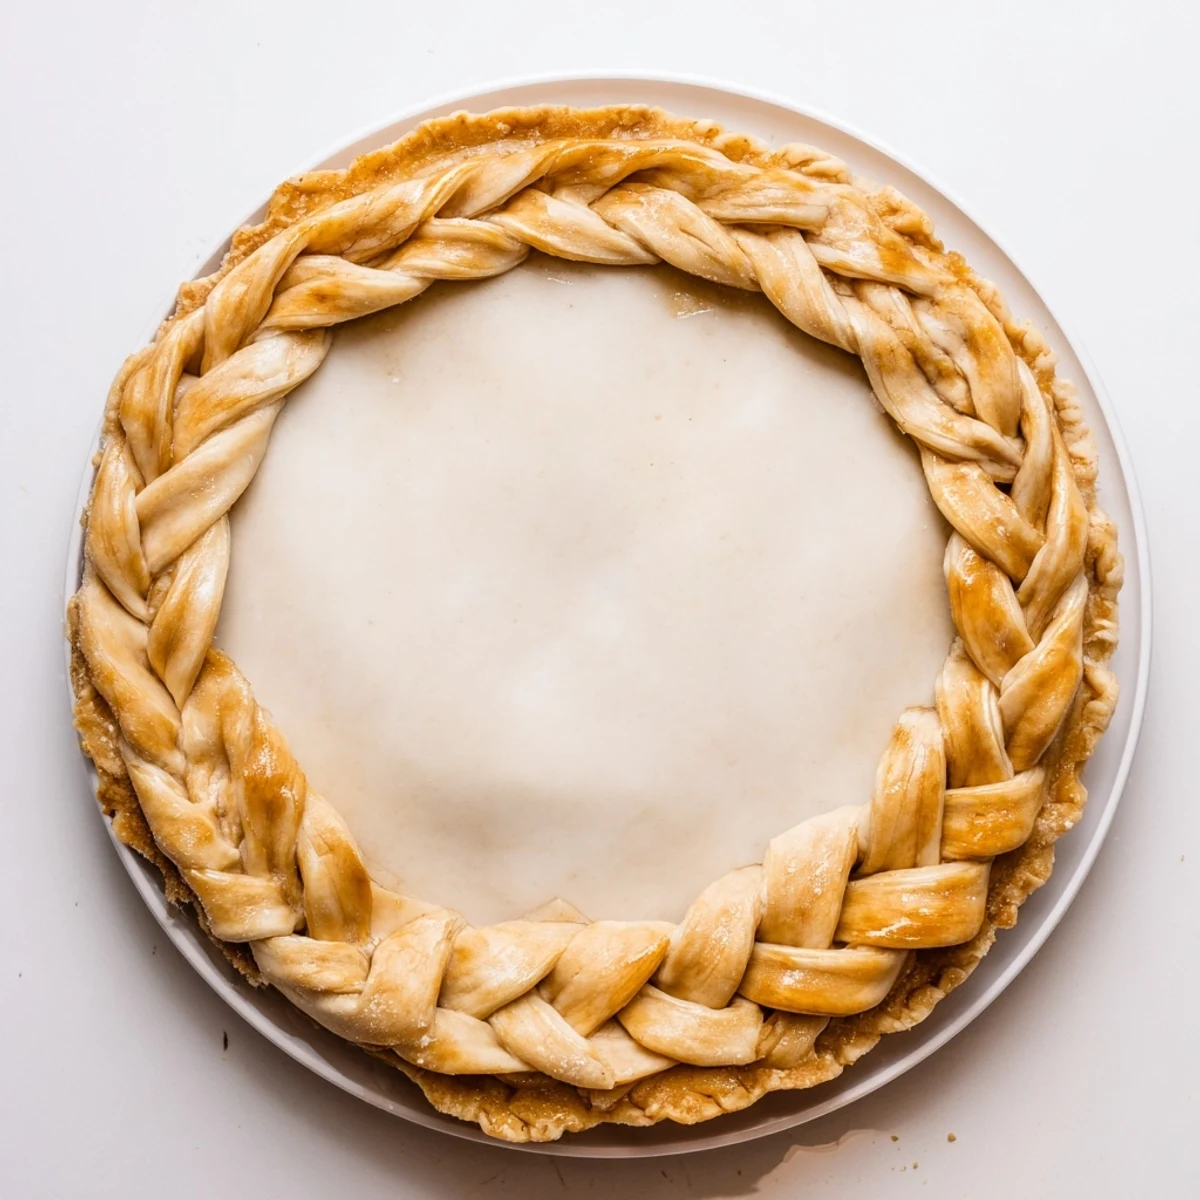
- Roll your base:
- On a lightly floured surface, roll one disc to fit your 9-inch pie plate, press it in gently, trim the edges, and return it to the fridge
- Prepare the braid strips:
- Roll the second disc to about 1/4 inch thick and cut twelve long, even strips about half an inch wide, grouping them into sets of four
- Master the fishtail:
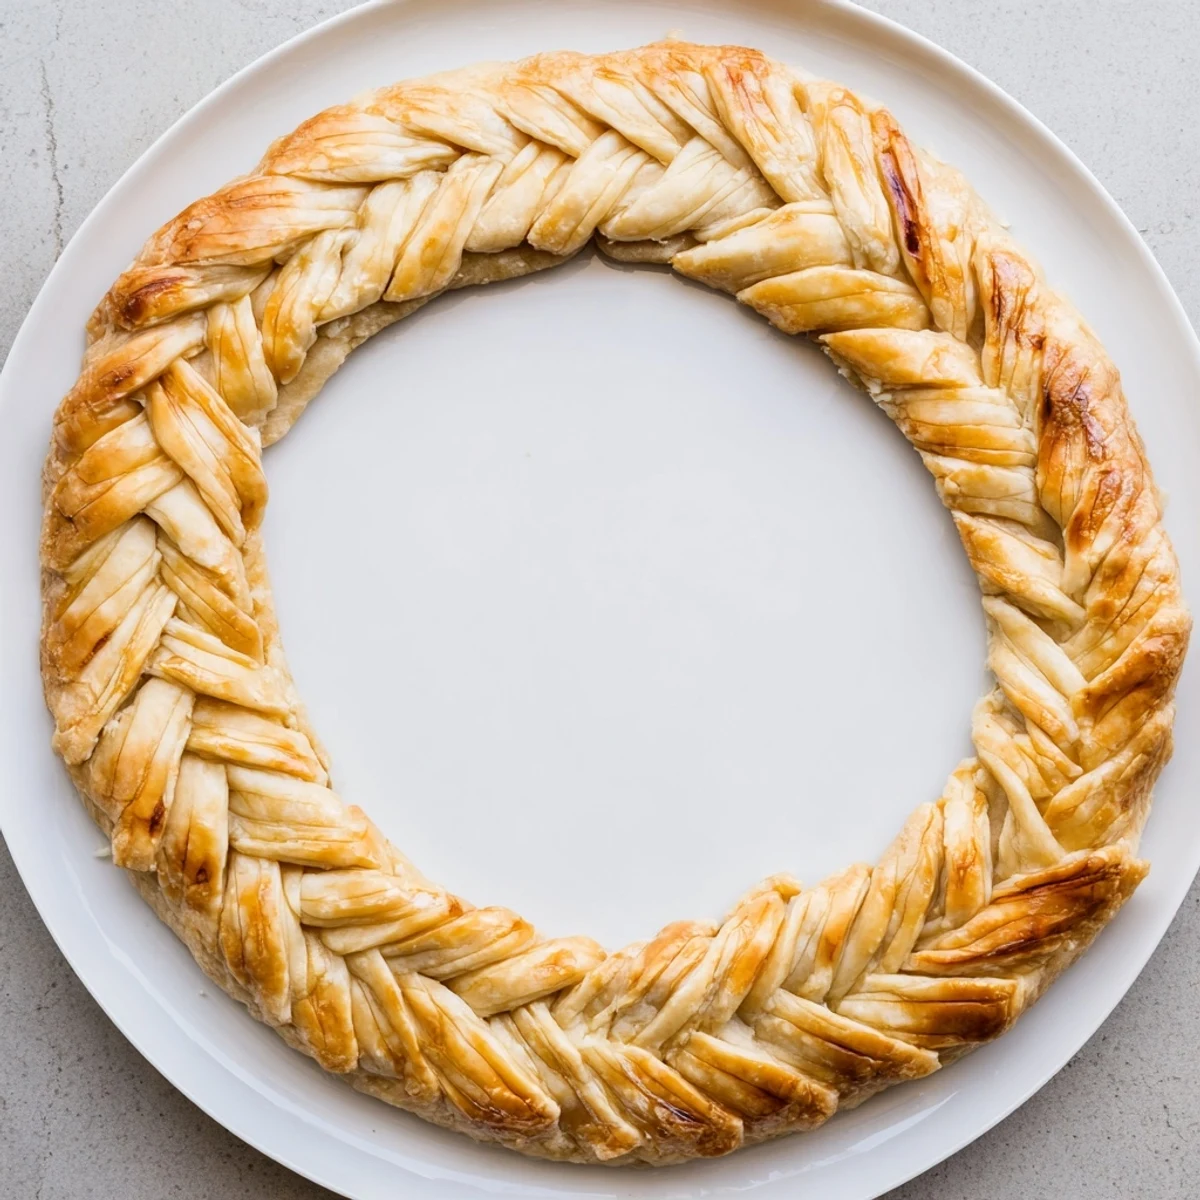
- Pinch the tops of each four-strip set together, then number them left to right and repeatedly cross the leftmost strip over, under, over until fully braided
- Attach the braids:
- Carefully transfer each braid to your chilled pie edge, pressing gently to adhere and trimming any excess, using a dab of water if needed for sealing
- Chill again before baking:
- Give the assembled pie another 15 minutes in the fridge while you preheat your oven to 400°F
- Egg wash and bake:
- Brush those beautiful braids with your egg wash mixture, then bake for 12 to 15 minutes until golden, adding pie weights if you're blind baking
 Save
Save Last Thanksgiving, my niece who swears she can't cook anything helped me with the braiding. She was so nervous about messing it up that her hands were shaking, but I talked her through the pattern slowly. When her pie came out of the oven with that gorgeous woven crust, she called her mom immediately to send a photo. That moment of pride, watching someone realize they could create something beautiful, stuck with me longer than the actual pie did.
Making The Dough Work For You
The secret I've discovered after years of pie making is that your dough tells you exactly what it needs. Some days it's thirsty and demands every drop of water, other days it's stubborn and resists coming together. Learning to read those subtle cues, that slightly tacky feeling versus dry and crumbly, makes all the difference between a frustrating experience and one that flows naturally.
Temperature Tricks
On particularly warm days, I've been known to chill my rolling pin and even my countertop. The butter needs to stay solid until it hits the oven heat, creating those magical flaky layers. If you find the dough becoming stubborn or sticky while working with the strips, pop everything back in the fridge for 10 minutes. There's no shame in taking breaks when your dough needs them.
Braid Variations That Work
Once you've mastered the basic fishtail, try mixing things up with different widths or numbers of strips. A three-strand braid gives a more traditional look, while going up to five strips creates an incredibly intricate pattern. The key is keeping your strips even in width, so invest in a good pastry wheel or ruler until you can eyeball it consistently.
- Practice the braiding motion with strips of paper first if you're nervous about wasting dough
- Keep a small bowl of water nearby for sealing any stubborn edges that won't stick
- Brush on a second layer of egg wash halfway through baking for that deep golden restaurant finish
 Save
Save There's something deeply satisfying about serving a pie that looks this impressive, especially when you see guests trying to figure out how you managed such intricate work. The secret, of course, is that it's mostly patience and practice, not some magical pastry skill.
Common Questions
- → What makes fishtail braiding different from regular braiding?
-
Fishtail braiding uses four strands woven in an alternating over-under pattern, creating a flatter, wider braid with a distinctive herringbone appearance. Unlike standard three-strand braids, this technique produces an intricate texture that resembles a fishtail, adding visual interest to pastry edges.
- → Can I make this crust ahead of time?
-
Absolutely. Prepare the dough discs and refrigerate for up to 3 days or freeze for 3 months. You can also braid the strips, arrange them on the pie crust, then freeze the entire assembled pie before baking. Thaw overnight in the refrigerator before blind baking as directed.
- → What fillings work best with this decorative crust?
-
This versatile topping pairs beautifully with fruit fillings like apple, cherry, or berry, where the decorative edge complements the colorful filling. It also elevates custard-based pies like pumpkin or pecan. For savory versions, try chicken pot pie or vegetable fillings—the braided crust adds an elegant touch to any filling.
- → How do I prevent the braids from unraveling during baking?
-
Pinch the tops of each strip set firmly before braiding to secure the starting point. When transferring braids to the crust, press gently where they meet the pie edge and use a small amount of water as glue. Chilling the assembled pie for 15 minutes before baking firms the butter, helping everything hold its shape in the oven.
- → Can I use store-bought pie dough instead of homemade?
-
Yes, refrigerated pie dough works well for this technique. Thaw according to package directions, then proceed with cutting strips and braiding. Store-bought dough may be slightly softer, so chill the rolled-out strips for 10-15 minutes before braiding to make them easier to handle and achieve clean, defined edges.
- → What if my braids look uneven or messy?
-
Pastry is forgiving! Slightly uneven braids often look charmingly rustic. For more uniform results, measure strip widths carefully with a ruler and keep tension consistent while braiding. Remember that the egg wash and baking process will blend minor imperfections, and filling the pie creates a beautiful presentation regardless of small flaws.